If you’re very active on Reddit and Instagram, you may have seen images with hidden messages visible when you twitch your eyes.
This is used by many marketers in their advertisements now and artists to convey profound and sometimes funny messages, too.
This started when a Redditor named /u/Ordinary_Ad_404 published a short tutorial for “images with ‘hidden’ text using Stable Diffusion and ControlNet” on the subreddit /r/stablediffusion.
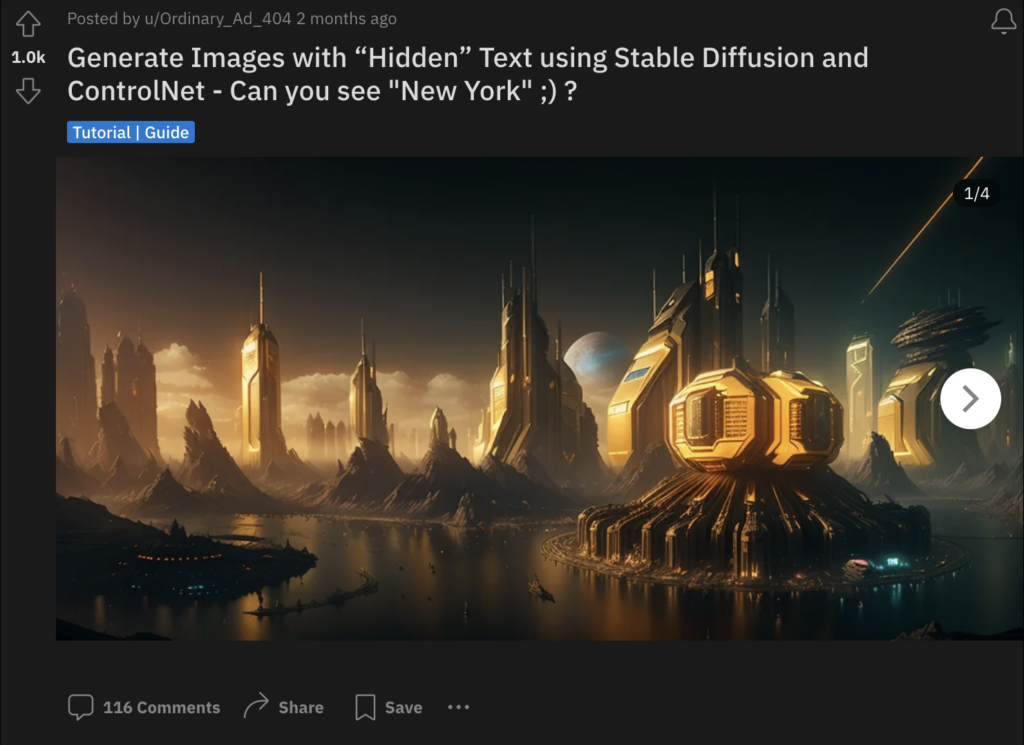
The post went viral, and from then on, everyone wanted to generate AI images with some secret text or message embedded into them.
Want to learn how to do this?
Read this post until the end, and you’ll learn how to add hidden or secret text to your AI images and generate some deep-meaning images or hilarious secret memes.
Method 1: Add Hidden Text in AI Images for Free Using Hugging Face
Before diving into the process, it’s worth noting that while multiple methods are available to infuse hidden text into AI images, our preferred choice is Hugging Face.
We have explored the stable diffusion and control net techniques, but if you need one or two images, then choosing Hugging Face is the right choice. Although this method can occasionally yield errors due to prolonged generation times, the wait is worth it.
In our case, it took about four attempts to get the desired results.
So, let’s find how you can add hidden messages or text within AI images for free.
Step 1: Choose a Photo Editing Software
Begin by selecting a photo editing software. A free, recommended choice is GIMP.
This software will be essential in creating the initial text you wish to hide in the AI image. Otherwise, you can also use Photoshop. For this tutorial, we have used Photoshop so begin by creating a new project.
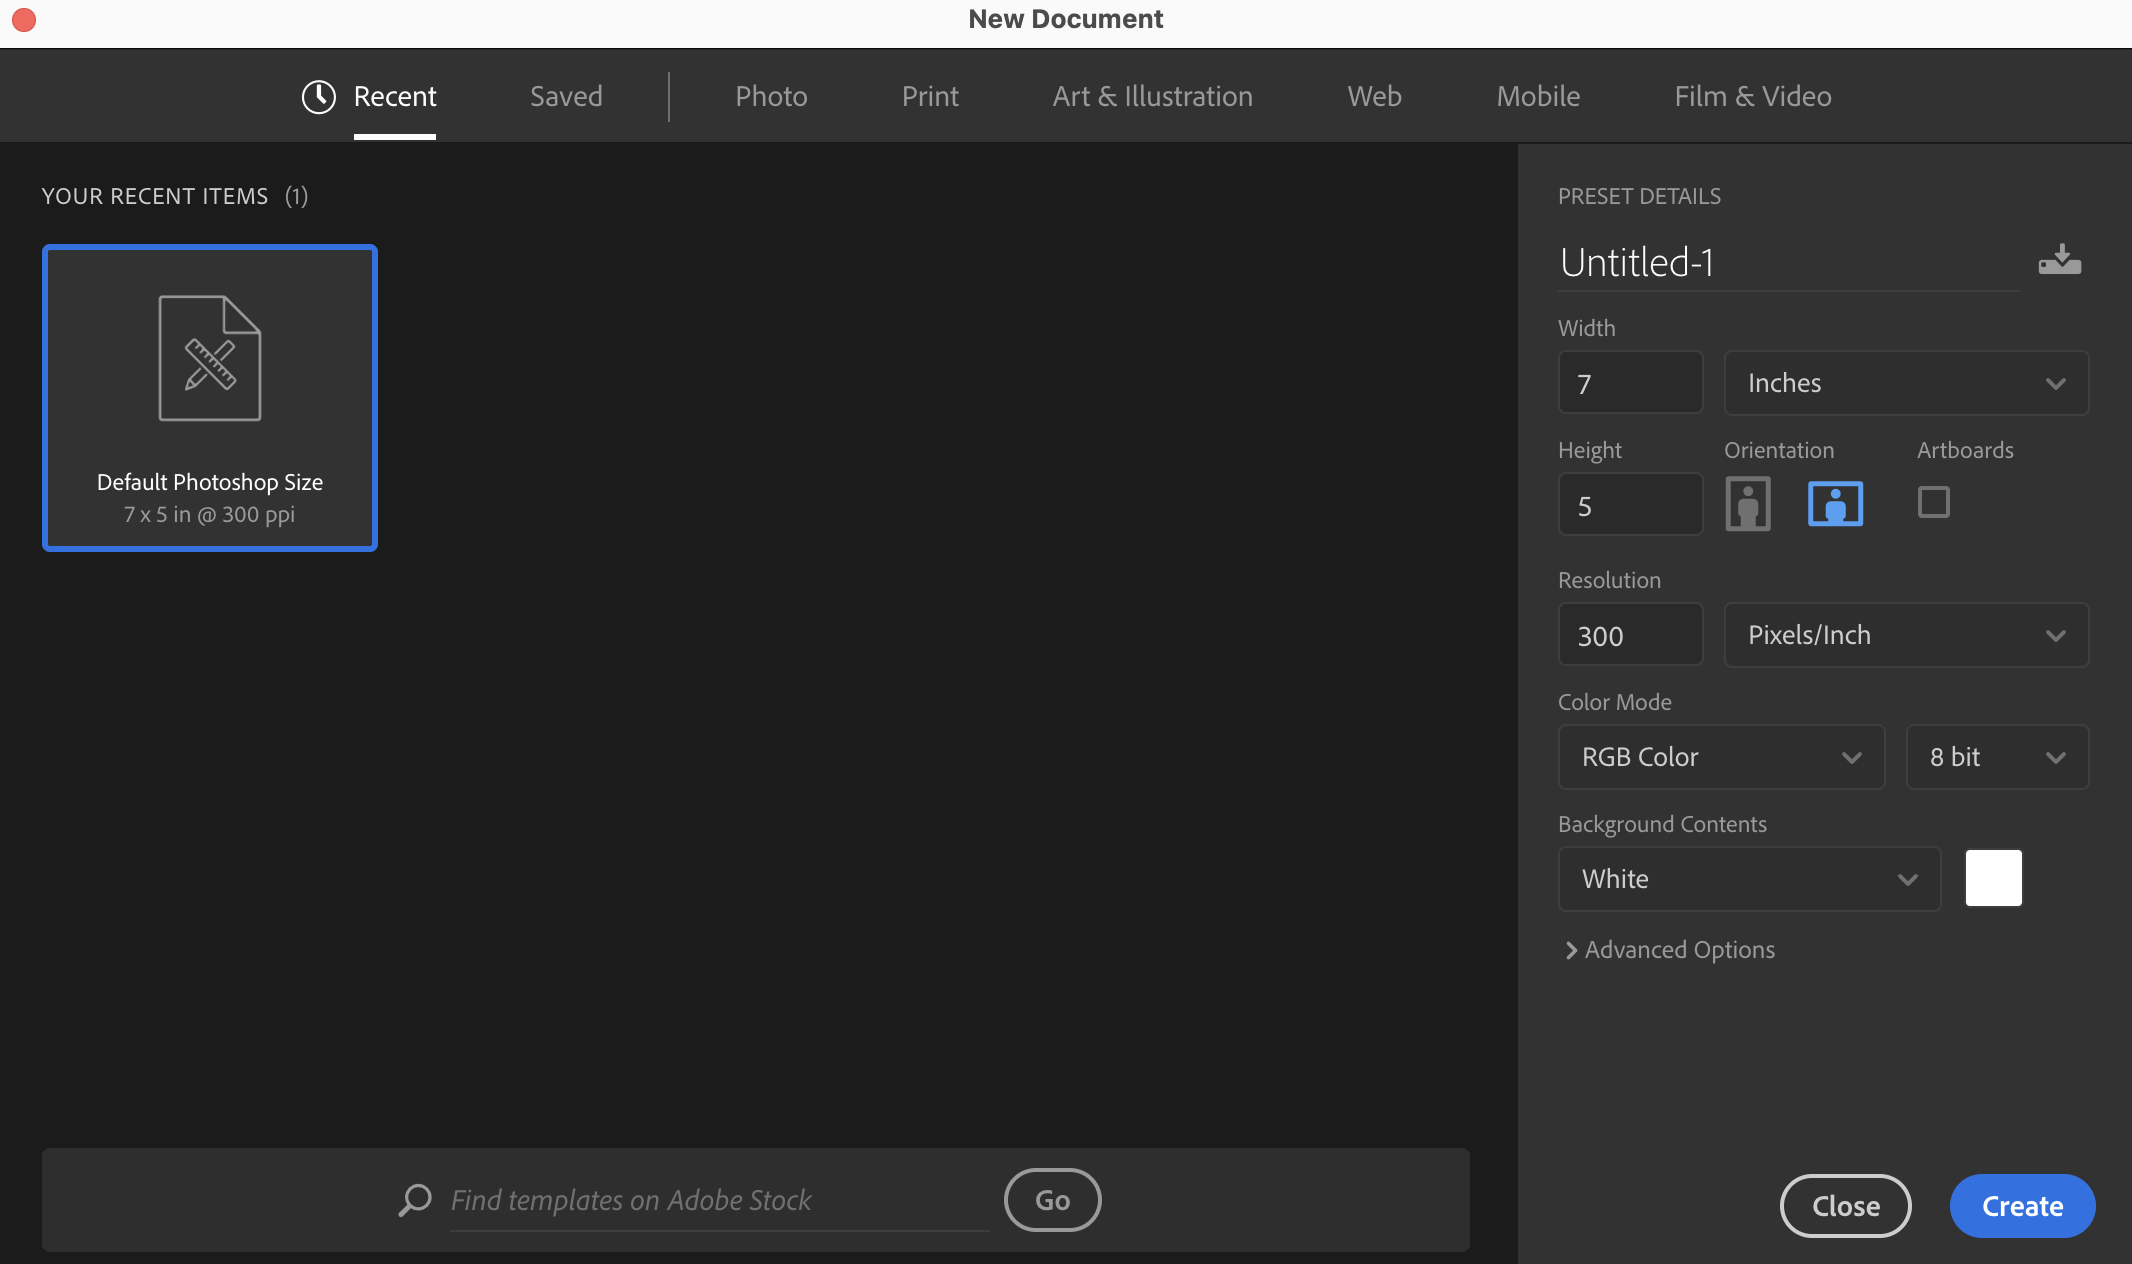
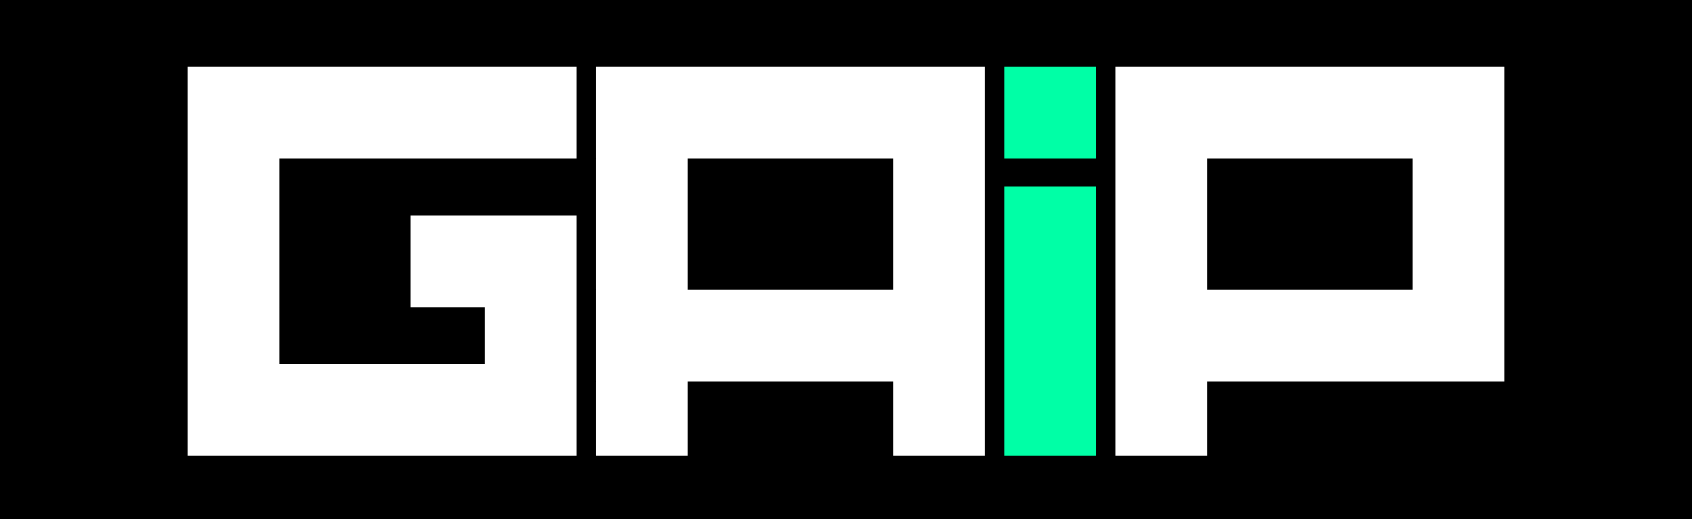
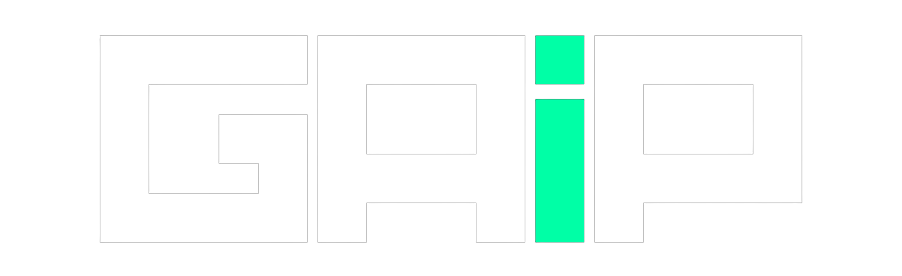
Step 2: Create Your Text
Then, use the Text tool and add the text or message you want to hide in the AI image.
For example, we wrote “G A I P” our website’s acronym. You can set the font size to 150 and style to Bold.
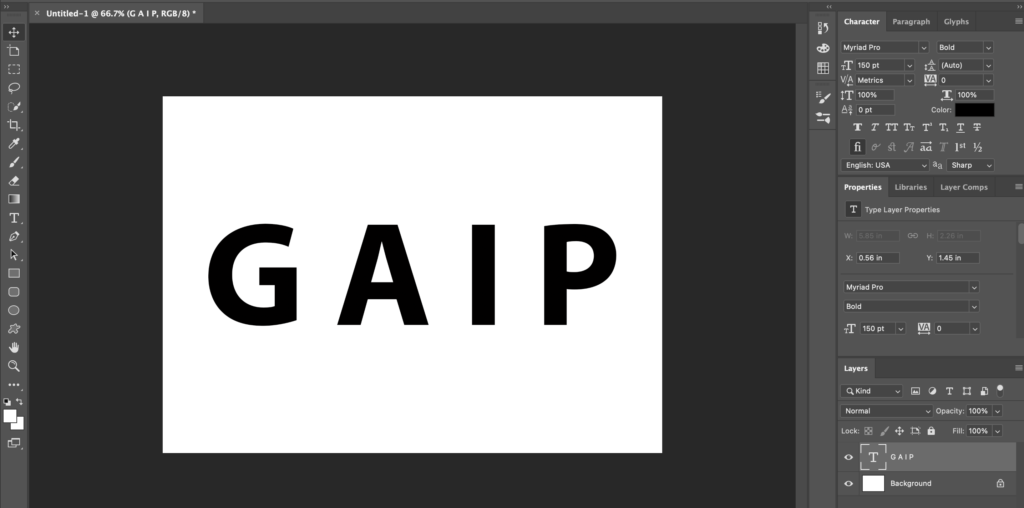
Step 4: Save the Image
Now, export your project by clicking File >> Export >> Quick Export as PNG.

Step 5: Use Illusion Diffusion
After saving your hidden image, you can head to Hugging Face by following this URL: https://huggingface.co/spaces/AP123/IllusionDiffusion.
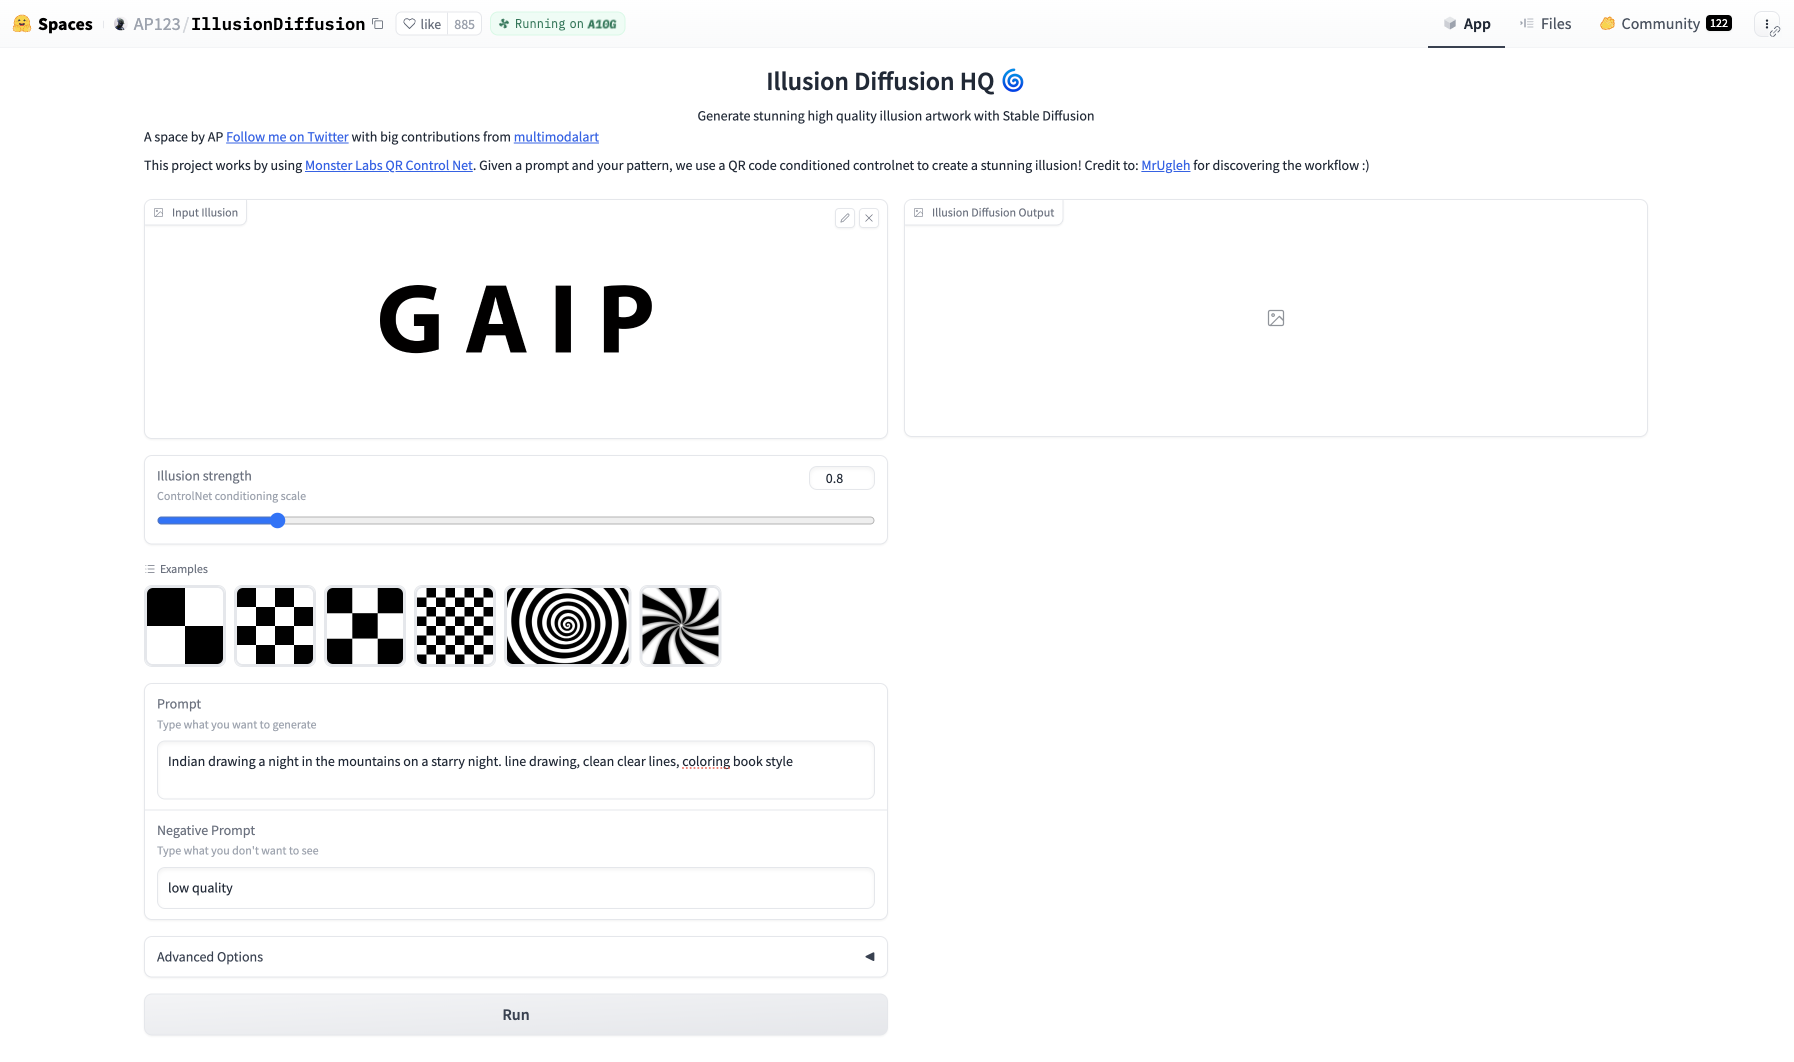
This will open the Illusion Diffusion HQ page where you can create your AI art with the help of Stable Diffusion and Control net integration for free and with few steps.
You’ll find an option to upload your image; simply left-click on it. Locate and double-click on your saved “GAIP” image. It should appear in the designated field on the website.
Adjust the ‘illusion strength’ and incorporate the ‘text to image‘ prompt. For instance, input “Indian drawing a night in the mountains on a starry night.” with a strength value of 0.8.
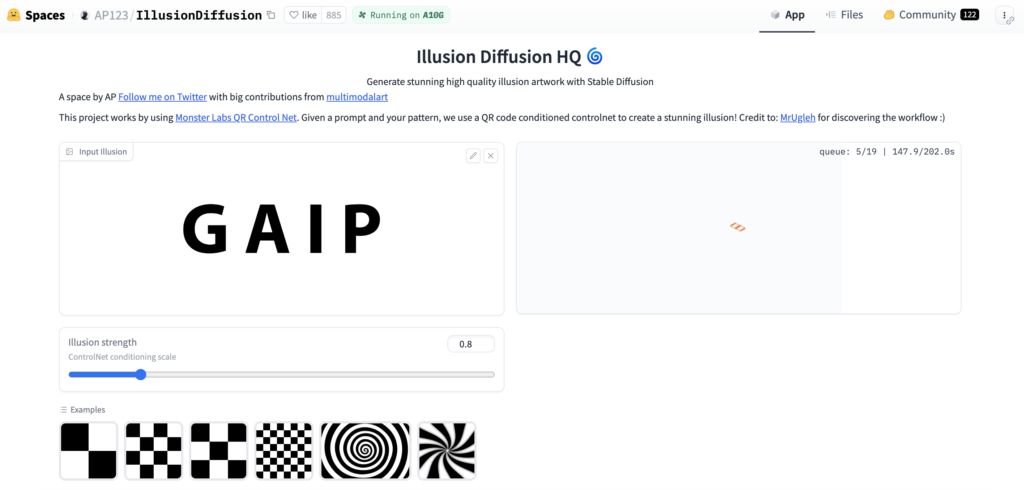
Give it a moment. Being a free service, there may be a queue, but it’s worth the wait.
Step 6: Your Hidden Text / Message AI Image is Ready
Once the process is complete, inspect the image. If done correctly, the text seamlessly integrates with the visual, appearing within elements like mountains.
Squint your eyes or move a little back and see this generated image; you will see the illusioned text that we used:
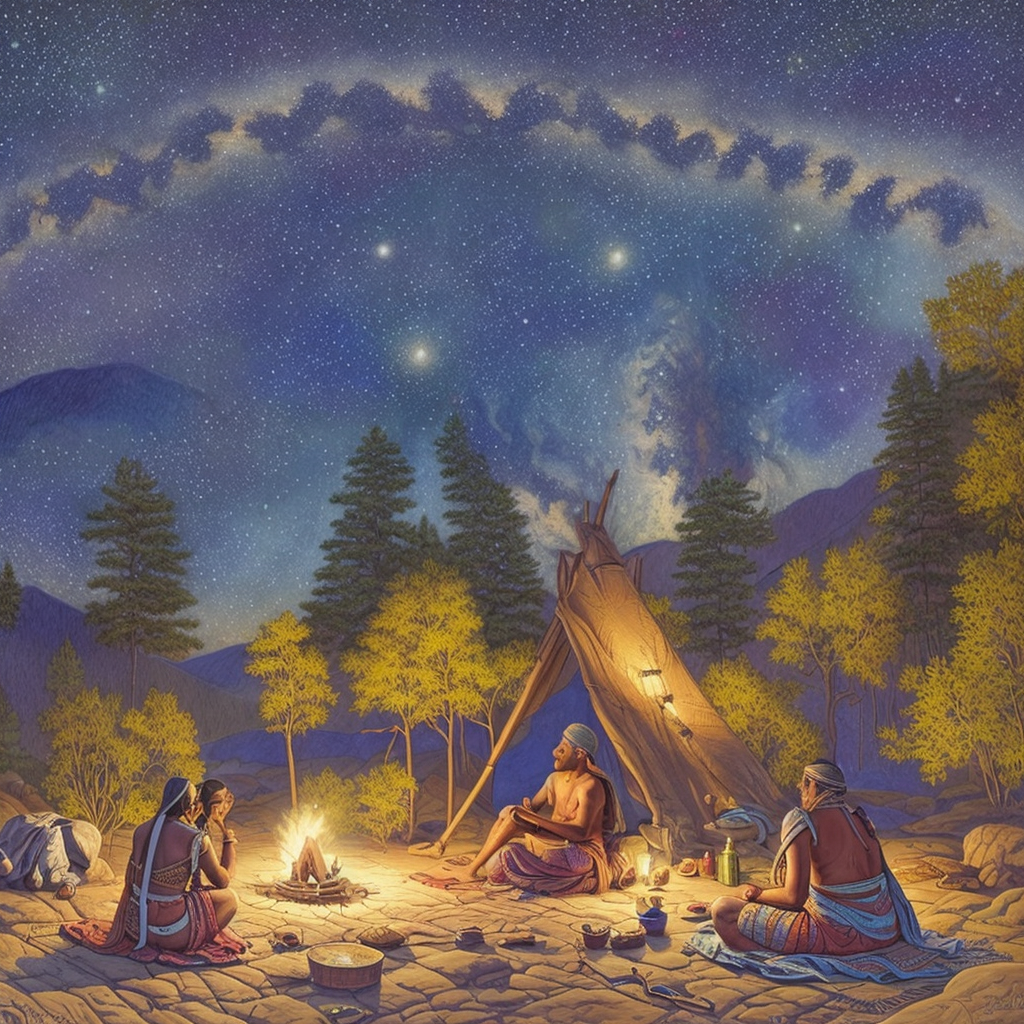
The visibility of the text will vary based on the ‘illusion strength’ and the chosen prompt. Therefore, it might require a few trials to find the perfect balance.
Pro Tip
Check out this YouTube video by Michael Brig if you love to watch video tutorials:
Method 2: Add Hidden Text in AI Images for Free Using Stable Diffusion
Using this method is also simple, but takes more effort and time. Anyways, if you’re more into Stable Diffusion, this method is just for you:
Step 1: Create an Image with the Desired Text or Choose a Reference Image
Generate an image file with text (like “INDIA” or “Shanghai”) using a tool like ImageToText. Alternatively, graphic design platforms like Canva or GIMP work equally well.
Or, another easy way to craft this is through Canva. Head to Canva and select a canvas size, preferably 1024 by 512 pixels, for optimum results.
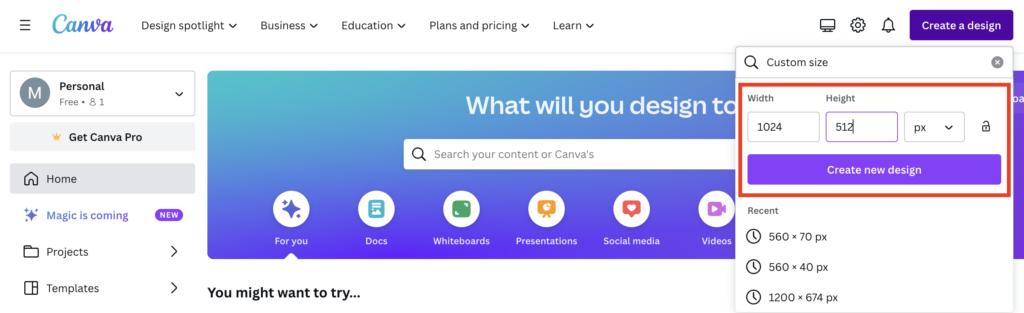
Using the Canvas type tool, type in your desired text.
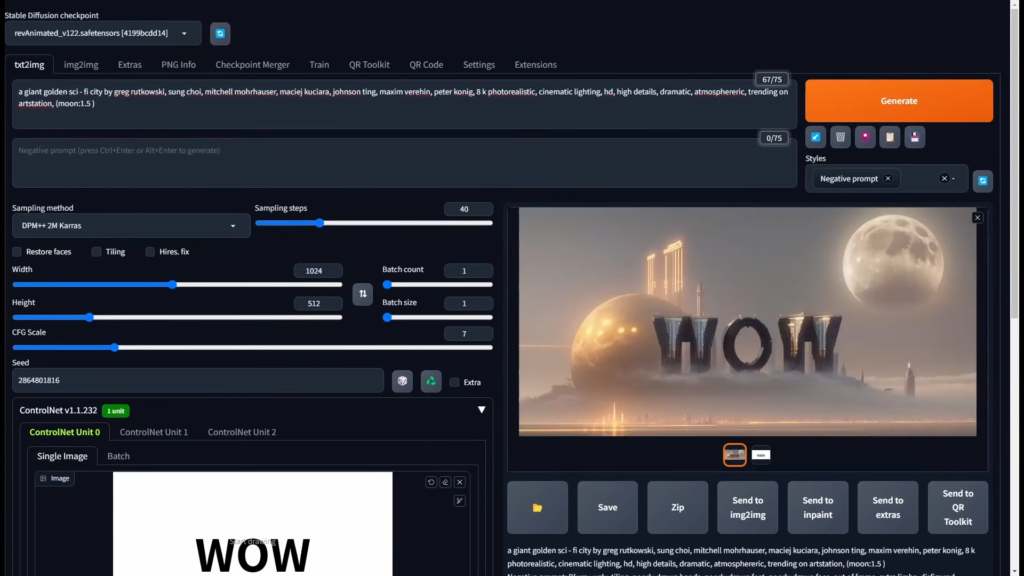
For our example, we’ll be using the word “WOW“. Ensure your text contrasts well against a white background.
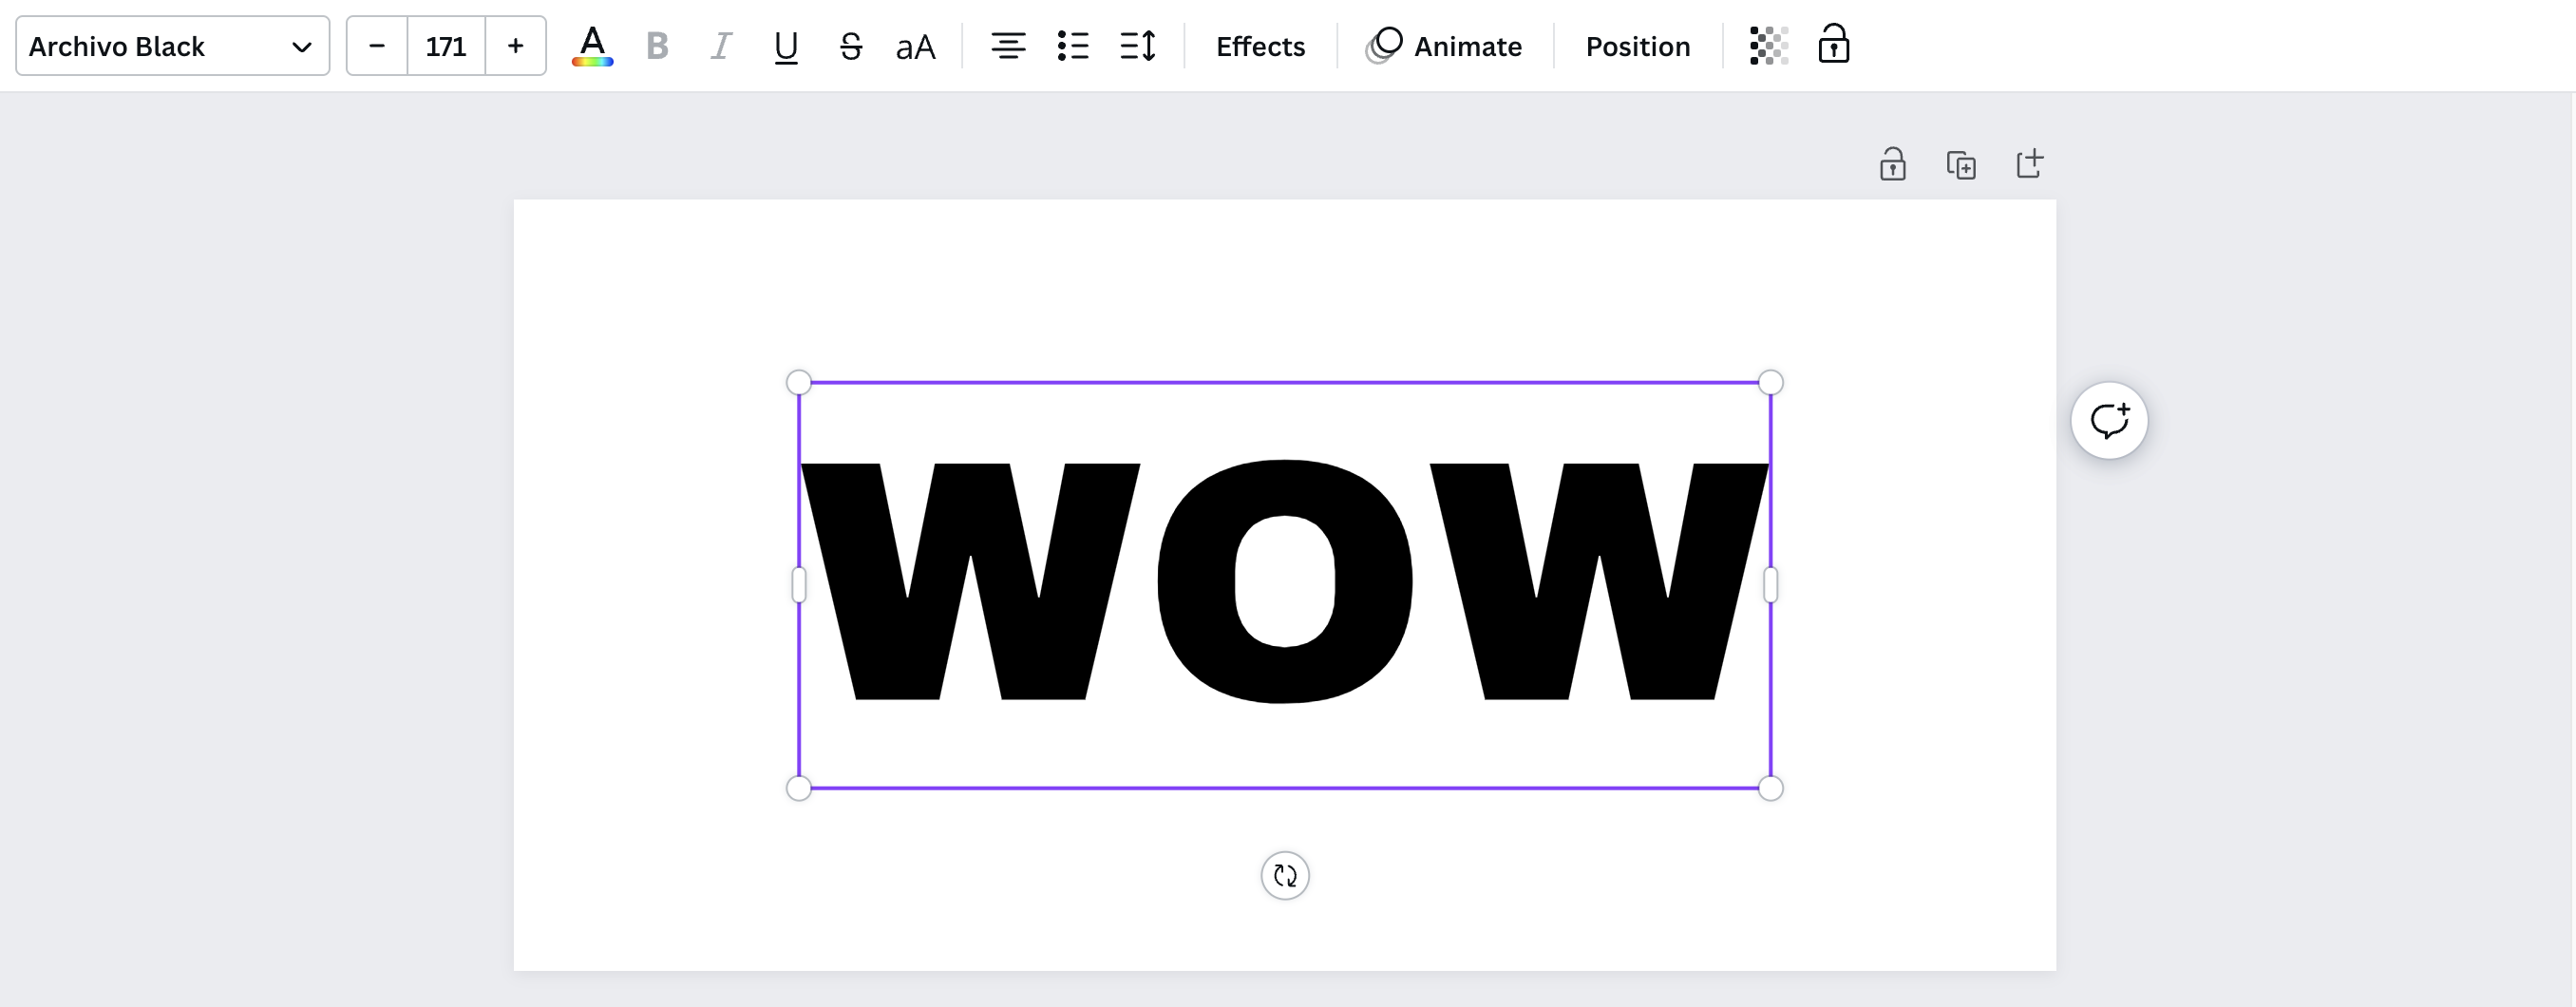
Once satisfied, save your creation but refrain from opting for a transparent background; the white backdrop plays a crucial role in our ensuing steps.
Additionally, if you aim to embed a hidden image, simply pick a reference picture of your choice.
Step 2: Set Up ControlNet and Stable Diffusion
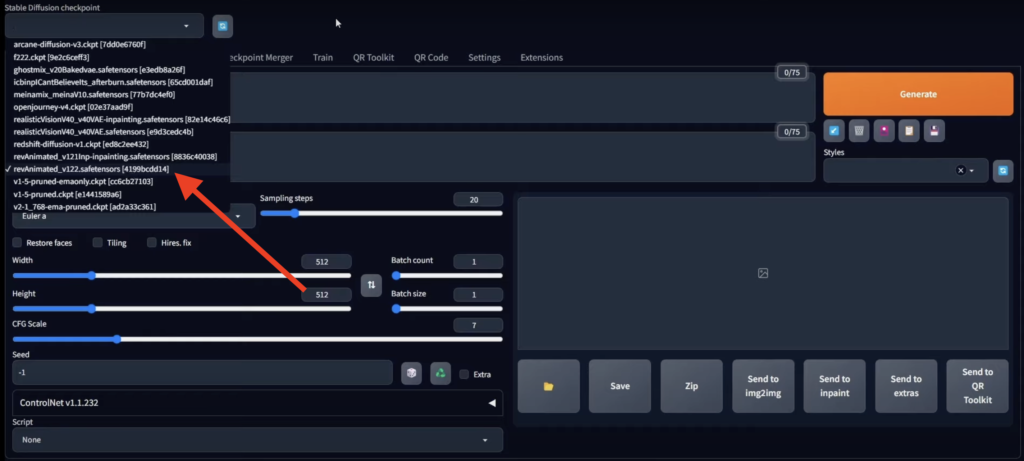
For our tutorial, we’re using the ‘rev animated checkpoint‘.
However, the beauty of this method is its flexibility. Feel free to experiment with other checkpoints.
Links to these checkpoints are readily available, and you’ll often find them in the descriptive sections of AI-related tools.
Upon landing on the Stable Diffusion interface, navigate to the ‘text-to-image‘ tab.
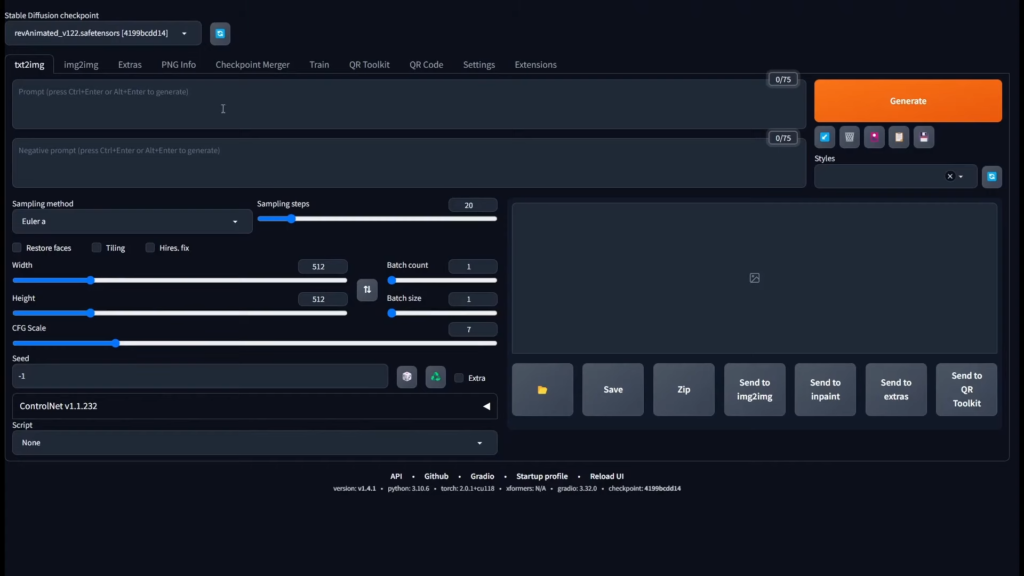
This is where you’ll be uploading the image with your chosen word. Once done, turn your attention to the stable diffusion parameters.
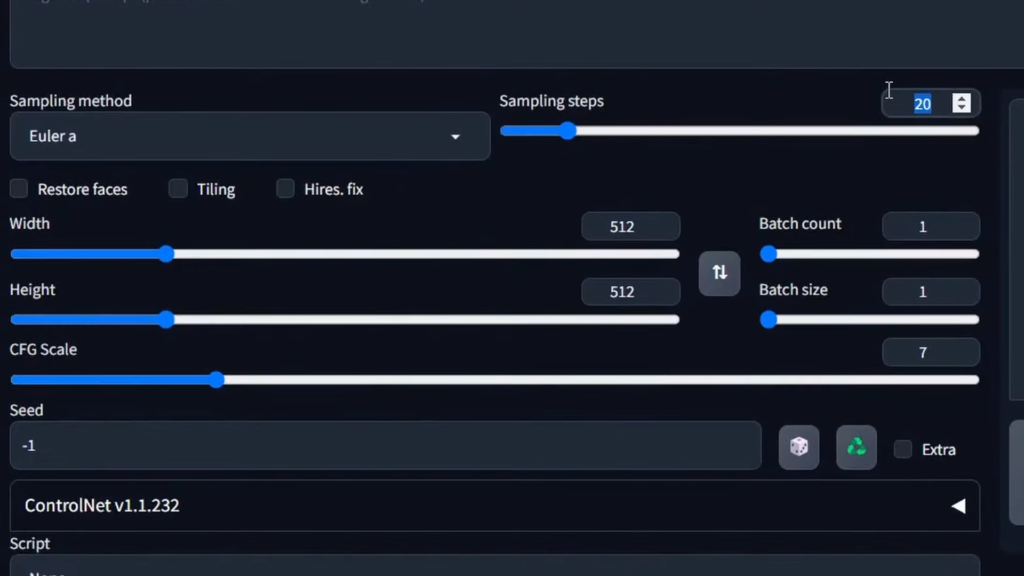
Consider setting the assembling steps to 40 and the sampling method to DPM++ 2M Karras.
Remember, the image dimensions you select here should mirror those of your text image, ensuring you don’t need to resize later.
You’ll require ControlNet to successfully generate your AI art with the hidden component.
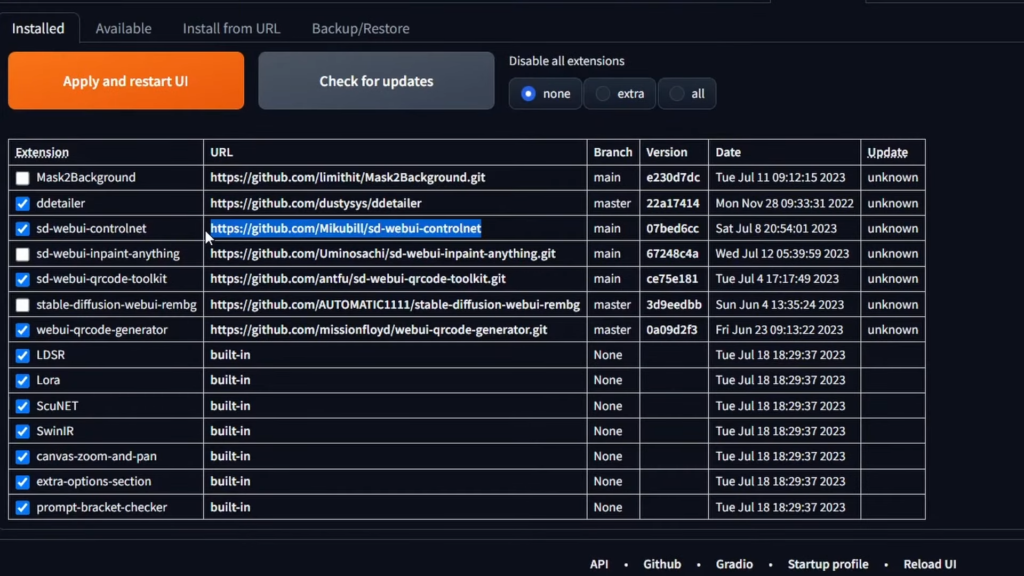
If you’re new to ControlNet, you’ll need to initiate it. Head to ‘extensions‘, move to the ‘available‘ tab, and click on the ‘load from’ button.
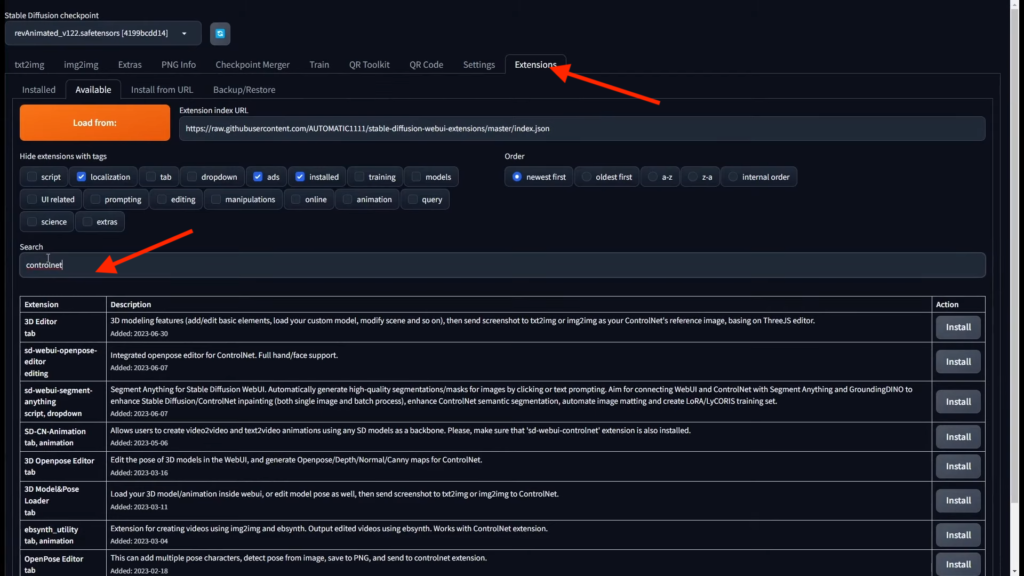
A simple search for ‘control net‘ should allow you to integrate it. Once done, you’ll notice it listed under the ‘installed‘ tab. You can also refer to this tutorial.
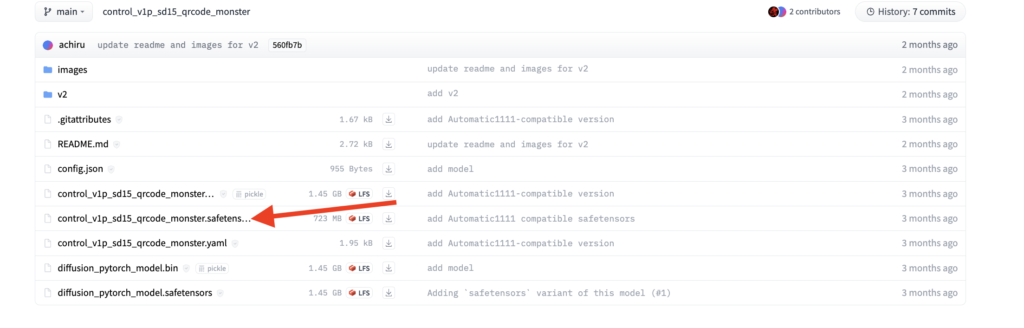
Also, do not forget to add the control_v1p_sd15_qrcode_monster.safetensors model, which you can grab from this repository.
Step 3: Start Generating Your Squinting Image
With your parameters set, it’s time to generate your artwork. Select a ‘negative prompt‘ from available styles.
For our tutorial, we’re using a preset prompt, accessible from the documentation.
Prompt: "a giant golden sci - fi city by greg rutkowski, sung choi, mitchell mohrhauser, maciej kuciara, johnson ting, maxim verehin, peter konig, 8 k photorealistic, cinematic lighting, hd, high details, dramatic, atmosphereric, trending on artstation"

Negative prompt: "(deformed, distorted, disfigured:1.3), poorly drawn, bad anatomy, wrong anatomy, extra limb, missing limb, floating limbs, (mutated hands and fingers:1.4), disconnected limbs, mutation, mutated, ugly, disgusting, blurry, amputation"

Source
Once selected, instruct the system to generate the image.
The generation process can be iterative.
Navigating ControlNet requires a keen eye on specific parameters: control weight, starting control step, and ending control step.
These settings govern the visibility of your hidden text in the final output. It’s a balancing act; the default settings might render the text almost invisible.
However, by increasing the control weight, your text becomes more pronounced. This interplay between settings is where your personal touch comes in.
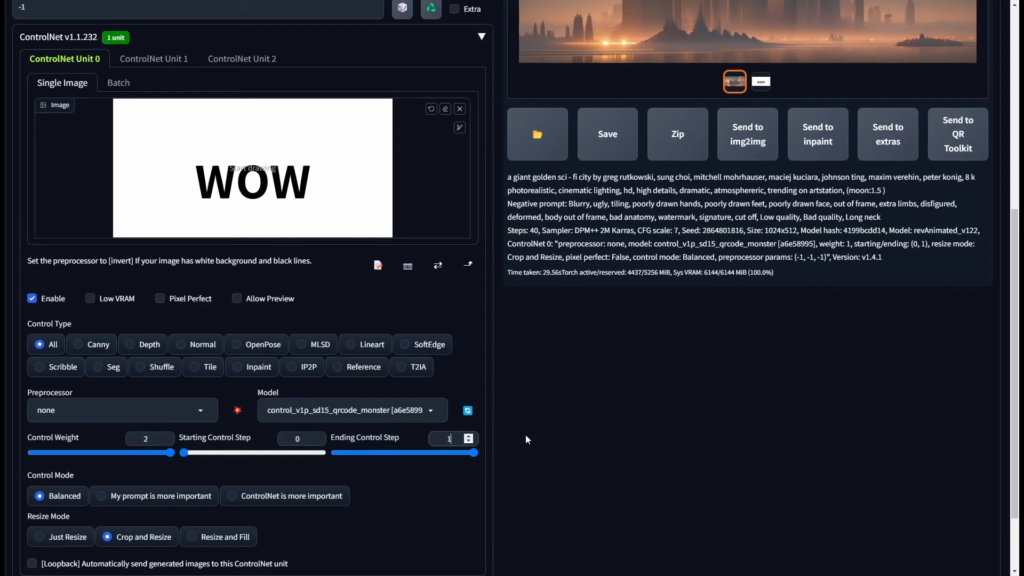
Here’s what you’ll get with a control weight of 2:
The more it is, the more visible your text will be. Hence, it’s recommended to keep it around 0.8 or 1. You can watch this video tutorial too and learn how to create squinting images with Stable Diffusion.
Generate the images, and you may want to experiment with different seeds or settings until you get a masterpiece you are satisfied with.
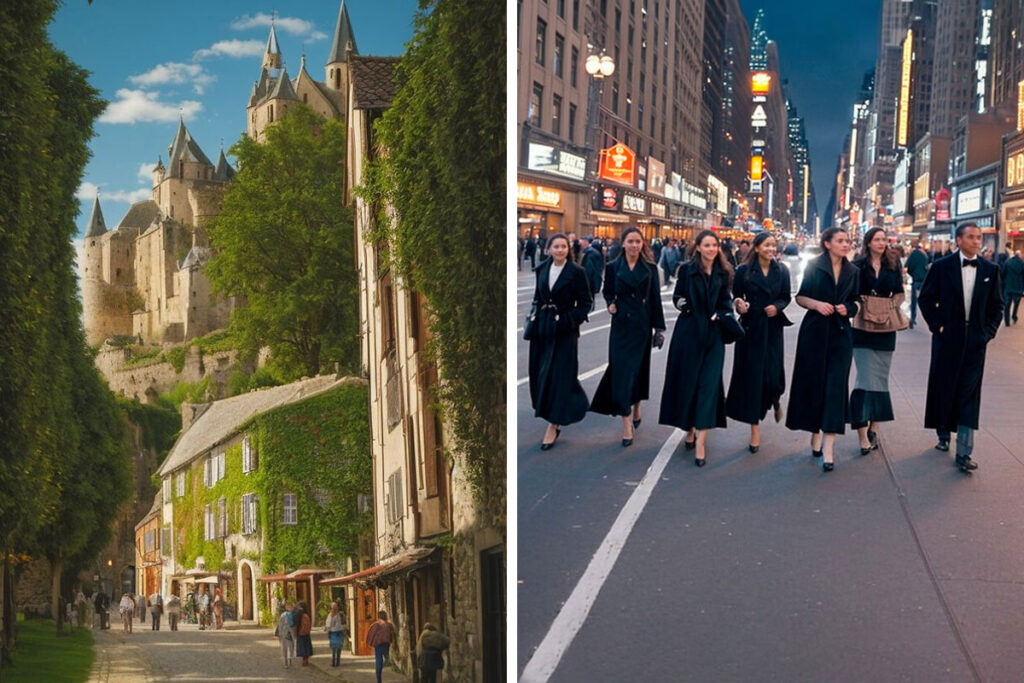
After playing around with more parameters, you’ll be able to create images like these:
The End
Putting hidden messages and references in AI images is a fun way to combine art and technology.
At first, the steps may seem complicated, but you can do it after reading this tutorial and watching some good video tutorials we have linked.
So, create some awesome squinting images, and do not forget to share your best artwork in our comment section.

