


Want to install Stable Diffusion on your Windows PC?

Stable Diffusion is built on top of deep learning models and has been trained on massive amounts of data, allowing it to generate high-quality images that are almost indistinguishable from real photos.
In this step-by-step guide, we’ll walk you through the process of downloading and installing Stable Diffusion on any Windows PC in few minutes, so you can start creating your own AI-generated images in no time.
So, let’s get started!
What is Stable Diffusion?
Stable Diffusion is a cutting-edge technology that uses deep learning to generate detailed images based on text descriptions.
It is a type of deep generative neural network called a latent diffusion model, developed by a group of researchers at LMU Munich.
This model is designed to remove successive applications of Gaussian noise on training images to generate images that accurately represent the given text prompt.
Stable Diffusion has gained significant attention because its code and model weights are publicly available, allowing more people to access this technology.
It can run on most consumer hardware equipped with a modest GPU, making it more accessible than other similar models that were previously only accessible through cloud services.
In simpler terms, Stable Diffusion is a tool that can help create realistic images based on written descriptions, and it is easier to use than previous similar models.
Before we jump into the steps of downloading Stable Diffusion on windows, let’s have a look on the basic system requirements for Stable Diffusion to run smoothly on your PC.
System Requirements To Download Stable Diffusion On Windows
- Windows 10/11, or Linux.
- An NVIDIA graphics card, preferably with 4GB or more of VRAM. But if you don’t have a compatible graphics card, you can still use it with a “Use CPU” setting. It’ll be very slow, but it should still work.
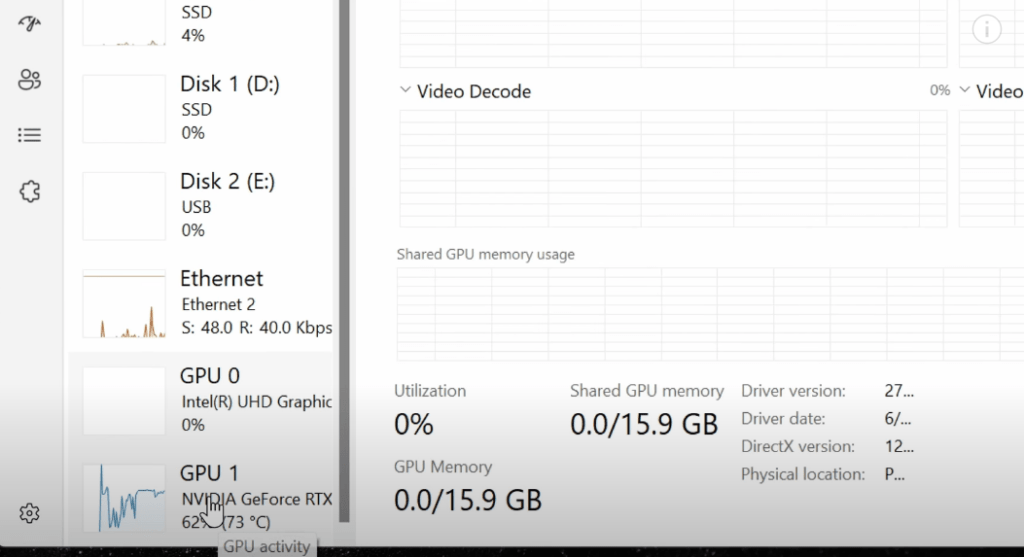
To check if you have a discrete GPU, press Ctrl + Shift + ESC.

Now, a task manager window will pop up.
On the left hand side, click Performance. After clicking performance, check at the bottom of the window if you can see NVIDIA in the GPU list then that’s a good news.
6 Steps To Download & Install Stable Diffusion On Windows
Downloading stable diffusion on Windows is easy. Here are just 6 steps that you must follow in order to successfuly install stable diffusion on your windows PC.
Here’s an overview of all the steps:
- Install GIT
- Install Python
- Install Stable Diffusion
- Choose Stable Diffusion Model
- Play around with Stable Diffusion on Windows
Before we start installing Stable Diffusion, you need to install two prerequisites: Git and Python.
Git is used for source control management, and you’ll use it to download and update Stable Diffusion. Python is a programming language, and Stable Diffusion is written in Python.
Step 1: Install GIT
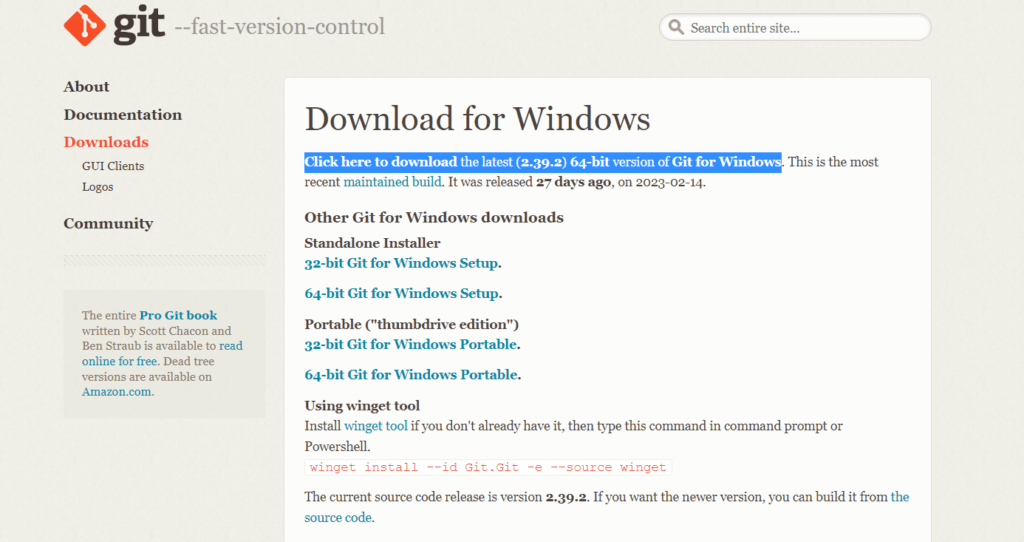
Go to git by clicking this link: Installing GIT
You’ll see git page where you can easily install git by clicking “Click here to download the latest (2.39.2) 64-bit version of Git for Windows.“
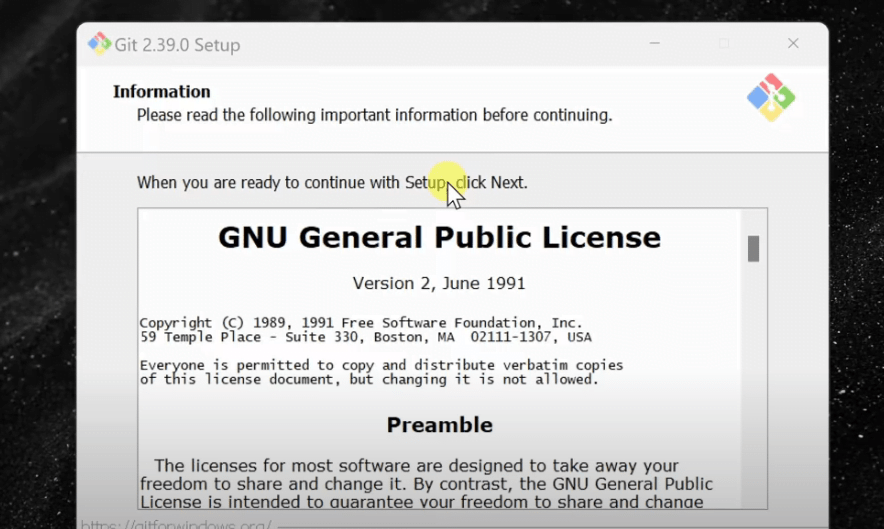
After you’ll download git, you’ll be prompted to git installation page from where you can install the git program. Also, keep the settings as default while installing.
Step 2: Install Python
Visit python downloading page, and then look for files.
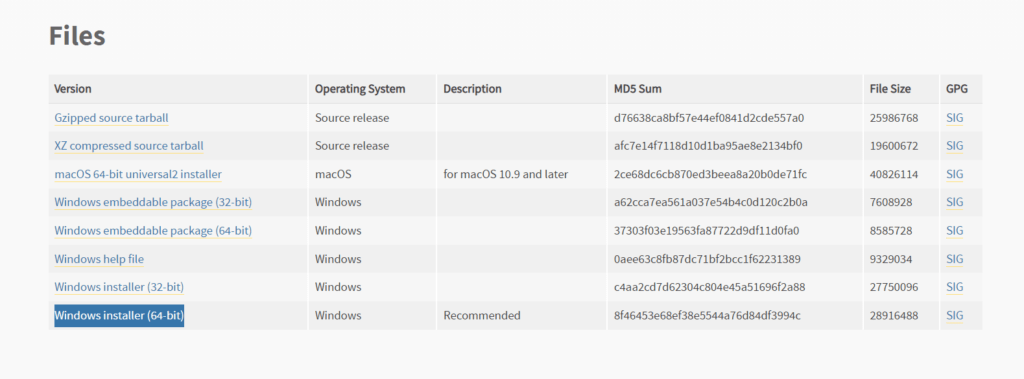
Click Windows installer (64-bit), and start installation.
Once you finish downloading python 64 bit, click the file to install it. After installing, make sure to click the checkbox Add python to path.
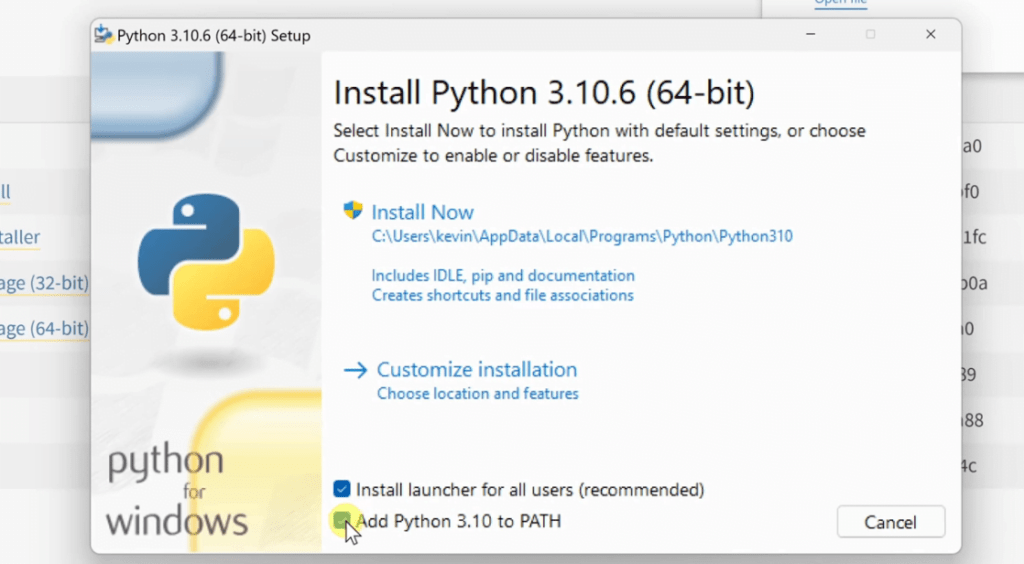
This will make it easier for you to run various python scripts.
Step 3: Installing Stable Diffusion
We will install a fork called “Web UI,” which is the most popular fork of Stable Diffusion and comes with a graphical interface that makes it easier to interact with.
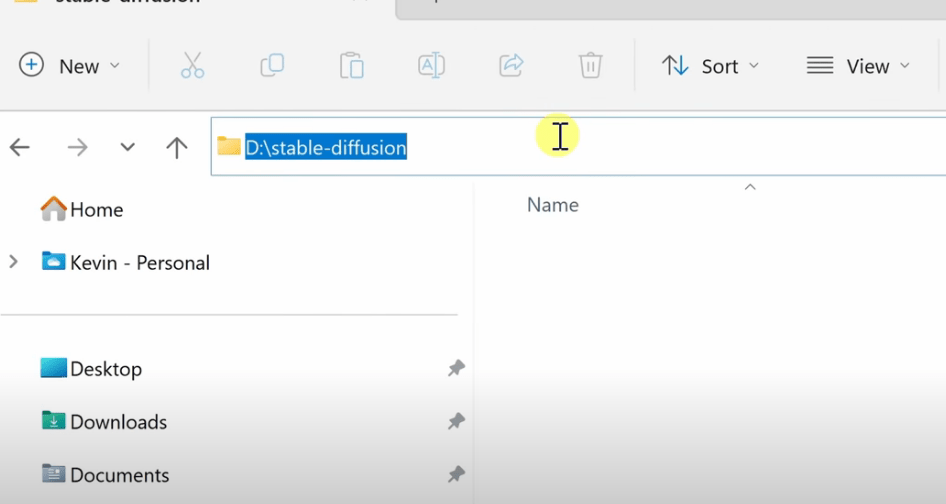
Open File Explorer and navigate to where you want to install Stable Diffusion.
Right-click and select “New Folder,” then type in “Stable Diffusion.”

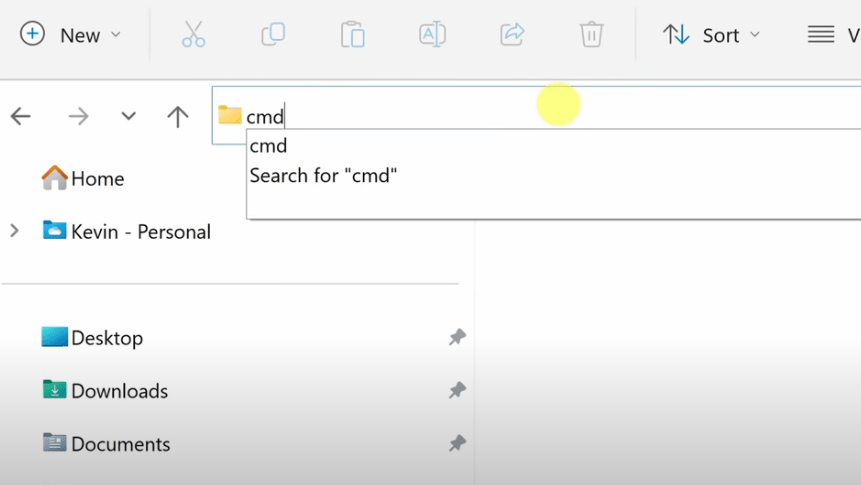
Click into the folder, and then type “CMD” into the address bar to open Command Prompt.
In Command Prompt, type “git clone” followed by the URL of the repository (https://github.com/AUTOMATIC1111/stable-diffusion-webui)
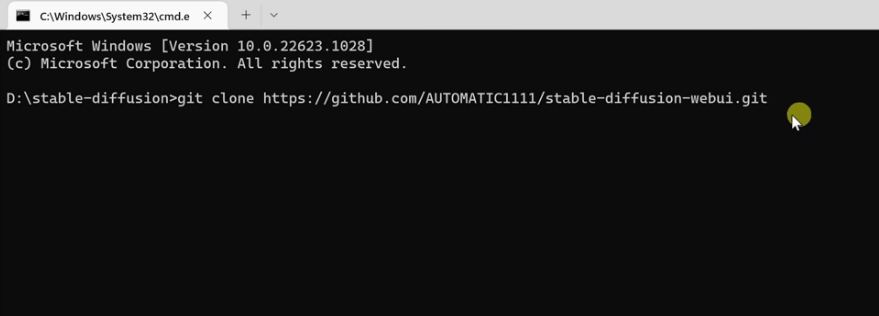
Once you hit enter, it will clone all the files in that repository, which will take some time.
Once you have cloned the repository, click back into File Explorer, and you will see a new folder called “Stable Diffusion Web UI.”

Click into that folder, and you will see all the associated repository files.
Step 4: Download a Stable Diffusion Model
Now, it’s time download our stable diffusion model. Download the stable diffusion model v1.5 from this link: Download Diffusion Model v1.5
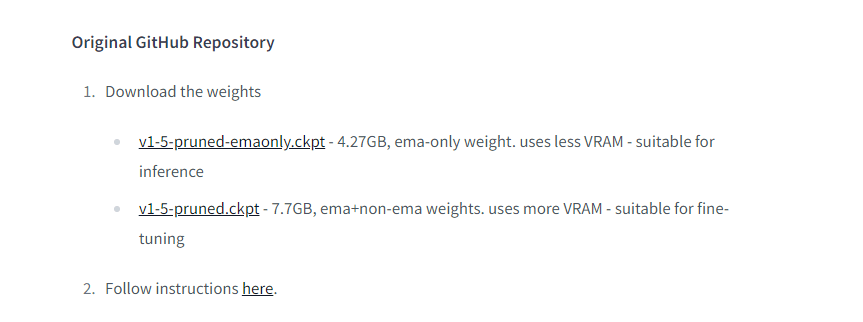
Choosing the right model for stable diffusion is important as different models generate different images with same prompt. It happens because every model is trained on different sets of data. So some models generate better animes, or some generate better cars. To find out more about models in stable diffusion check this article.
Once you finish download, rename the file to model.ckpt.
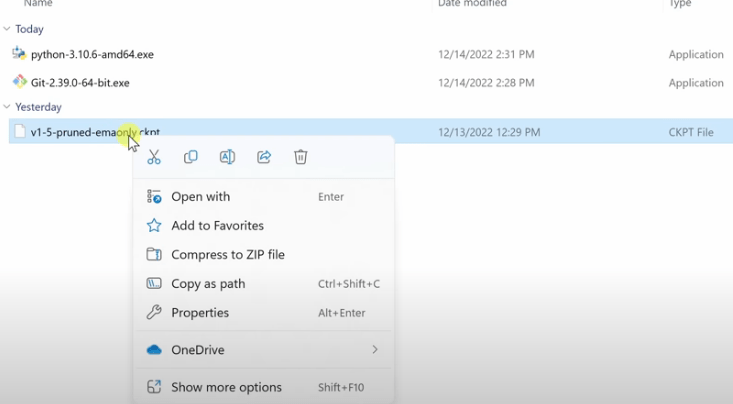
Copy the file, and navigate to Stable Diffusion folder you created earlier.
In the folder navigate to models » stable-diffusion and paste your file there.
Step 5: Launch Stable Diffusion
Now go back to the stable-diffusion-webui directory look for webui-user.bat. Open this directory in notepad and write git pull at the top.
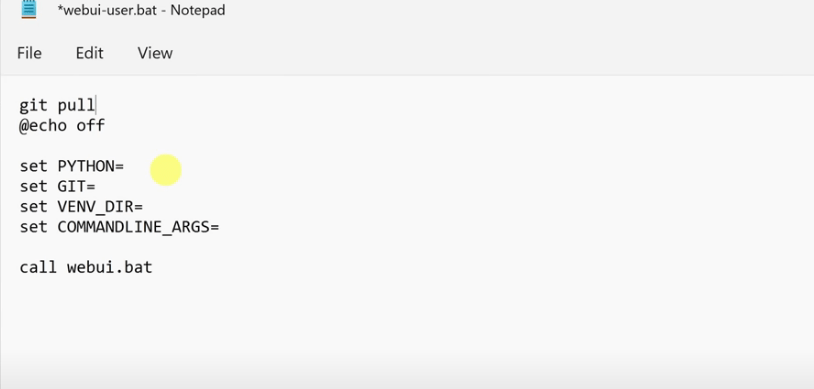
Save the file and open webui-user.bat file once again and click complete installation.
The upcoming task will require some time to complete. Once it’s finished, a message will appear that says:
“Running on local URL: http://127.0.0.1:7860“
Please note that in order to access the AUTOMATIC1111 webui, you’ll need to go to the following URL in your web browser:
Once you’ve arrived at the webui, type in a prompt as you wish, and click Generate to verify that Stable Diffusion is functioning properly.
To shut down Stable Diffusion when you’re finished, simply close the command prompt window.
If you need to use Stable Diffusion again, all you need to do is double-click on the webui-user.bat file.
Congrats, you successfully downloading and installed stable diffusion on Windows. If you’re a beginner, we have some awesome posts on stable diffusion so don’t forget to check those too.
You can also watch this video for if you’re stuck at any step:
The End!
We hope you liked this article. It is very easy to install and download stable diffusion on your windows system.
If you have any questions related to installation and downloading the model, reach us via comment section.
Thanks!
Read more articles:


